Showing posts with label building. Show all posts

Sunday, 20 September 2015

Building 15mm scale HMG nests

Hi all!
I've been asked how I did my HMG nests and objectives for Flames of War. What do I use to do them and where do I pull my ideas. The ideas come from everyday life and from experience, everyday life, from the works of others and from reference pictures.
Tools
- tooth picks/coctail sticks (a lot of them)
- PVA glue
- clippers
- pincers (optional, only if you don't want to glue your fingers)
- hobby knife (a sharp one, WATCH THOSE FINGERS!)
- little scissors (for cutting the gauge)
- medium/large bases (depends on what you want to build)
- pumice (you can chose the color and thickness by yourself, I'm using Brown Earth)
- tools to spread the pumice (the smaller the better, you can fit into small gaps)
- diyed gauge (feel free to use any color or method you like for diying, I used tea)
- The Plan
First, before anything, you have to have a clear plan, a visual (drawing, reference picture, plan in your head), what you're about to do. In my case, and example here, I had a visual of an L-shaped MG nest that we used to dig in the army, although we did it open topped.

The Plan

For starters I planned the general shape of the nest and the placement of camo nets, at this point all other, more decorative, groundwork was skipped. For this I used Adobe Photoshop CS 6 but this could have been made just as easily with Paint. The only thing that was measured into correct size was the base as it greatly helps to adjust everything else into correct size. For the HMG nests I use medium bases. which are 2”/50mm wide by 1¼”/32mm deep. If I'd do an objective I'd use large base which is 2”/50mm wide by 2½”/65mm deep.

First part - The Build - Front view
Following the plan closely I started cutting all the needed pieces for the first layer. I did it this way so I could first match up one layer and then cut the rest of the pieces using the firsts as guides.

Once all the pieces were cut I used PVA glue to make up the first layer and let it settle for a while. It's easier to work after the base is stabile. I prefer PVA over super glue because it hardens slowly and you have time to adjust the "logs" into right place. I suggest using pincers to help with the placement (I didn't use and got my fingers glued - luckily only with PVA which you can get off easily).

First part - The Build - Back view
I first built the basic structure without the roof as I added some support beams inside. Then made the roof to stabily the whole built. The entryway and the firing slit outer walls were built last.

First part - The Build - Top view

Second part - The Ground - Front view
After the PVA had dried I glued some tree trunks (the fallen tree trunk was added after the pumice) and then dug out my Brown Earth pumice and started to spread it with a small tool. I tried to leave the roof and one layer of logs visible. I forgot first to put pumice to the roof but put it there later on.

Second part - The Ground - Back view
Now it was time to add the rocks to bring some more life to the bases. I did this before the pumice dried so didn't have to use any glue on them.

Sorry for missing all the pictures of part three which was painting the whole thing up.

Ground:
First a wash with Nuln Oil, followed by multiple drybrush layers of VMC Beige Brown (until you are hapy with it). Then highlighted with Citadel Kommando Khaki (again until you're hapy with it).

Nest:
Basecoated with VMC Chocolate Brown and then washed with Nuln Oil to deepen the reccess. I then used the Beige Brown to highlight the the woodworks and did secondary highlight with a mix of Beige Brown and White (can't remember my mix but you do it with what looks good for you). And naturally you can try with different colors to create different type of trees. Or you can leave the tree trunks as is. I actually tried to mimic birch with the fallen tree, basecoated it with Black, then made random patterns with Pale Grey Blue and highlighted with White.

MGs were painted with Light Grey, washed with Nuln Oil and highlighted with Light Grey.

Fourth part - Camoflage - Back view
Once all the painting was done it was time to add rest of the nature. I tried to randomize the placement for the bushes (suggesting PVA for this) and grass (use watered down PVA for this). Lastly it was time to add camo nets. First cutted the gauge into rectangular shapes and positioned them somewhat where I think it would help to hide the nest. I then applied watered down PVA with a brush and bend the gauge into shape.

Fourth part - Camoflage - Front view
And here you go, the end result of our build. Notice how the gauge has darkened while the PVA has dried.

Finished result - Back view

Finished result - Birds eye

Finished result - Front view
And here is a little flashback of my older I-shaped HMG nests. These are also build on medium base but as they are only I-shaped they have more room inside so I could fit a gunner with MG inside instead of just an MG like in L-shaped nest.
I-shaped, finished, HMG nests
I hope you find this usefull but if you have any questions, please leave them in the comments :)

Friday, 11 September 2015

Long time no post - Please have some HMG!

Hi and sorry for not posting anything up for a long time. I've been quite busy at my work and personal life and thus it has all limited my time to finish anything.

But something has been finished, it's nothing big but I'm quite fond of them although two of them will be shipping out but I hope to still see them on the battlefield and AARs by a friend abroad. So what have I finished, well three HMG nests.

These are built in L-shape with exit routes. The idea came to me thanks to the friend who asked me to do some nests and from my time in Finnish Defence Forces and when we dug up this kind of possitions into the woods. Otherwise these are built just like the earlier HMG nests.

Thank you and enjoy!

Thursday, 23 July 2015

Last line of defence, objective

While I'm waiting for the Jagdtiger to arrive to LGS for the Nibelungen Works objective, I've started planning for the next build. I think this could be located to either front or inside Berlin itself, a last defence line. It will be an Anti-Tank bunker armed with 3,7cm PaK36 (definately outdated by the end of the war) which will be defended by two German soldiers armed to the teeth with panzerfausts, panzerschreck and an MG42.

This would be either an active bunker made out of concrete (would be build like the wall on the Nibelungen Works) or a destroyed one, I haven't desided yet.

So far there is only a sketch drawing with no thought given to troop or equipment placement. I will get to that once I'm closer to finishing the Nibelungen Works objective.

If you'd like to help with planning and have your "touch" seen in this build, drop me a comment with your suggestion.

Thank you for reading!

Wednesday, 22 July 2015

Jagdtiger factory - Nibelungen Works, objective

Hello there!

Thanks to some other very good painters and bloggers I've opted to build and paint a red tone Jagdtiger. Difference in my work is, I'm going to use it not only in gaming but also as an objective. I thought that I should do something different on this build compared to what others have do (or what I've seen) so why not build some surroundings. And what would be more iconic than the building site of these behemoths, the Nibelungen Works.

Due to heavy weight of JT I need to do some more work for the building and planning stages as I'll need to add some magnets to hold the massive weight of the JT in place. For this I'll be using 3 or 4 5mm*1mm round rare earth magnets with one side drilled into the tracks and the other smoothed to pavement level with pumice.

The scene will be set as a JT parked next to a concrete wall while a guard watches over so no one will try to steal or sabotage this great beast.

The concrete wall is made with inner core from coctail sticks and a light layer of pumice to create the concrete itself, the coctail sticks create a nice shape, just like the one when builders use a mold build from planks to cast the concrete.

As my pumice is light brownish I first painted it black and then light grey. It was then washed to bring out the details and drybrushed with different shades of light grey. I also reasoned that my wall would need a barbed wire on top of it so I took some wire and rolled it around a paintbrush. I then painted it grey with a bit different shade than the wall itself and clued it in place.

 Thanks for reading and be sure to check out for further updates on the project.


Friday, 26 June 2015

German objectives

Hi all :)

I finally managed to finish my two objectives I have been building for almost two months now. As the summer begun so did my "daytime" job (nightshifts) which perfectly cut my painting time to zero. But I did took some time where I could and little by little finished this build.

I'm quite pleased for the end results though I think the "bunker" came out too high. What I really like is the look of the forward outpost. As an after thought I could have added some more equipments like panzerfausts and boxes but I can add those later if I want (no varnish applied).


I am already planning new objectives to be built, or pillboxes on a large base. Will post some sketch images once I get my pen and paper out.

Thanks for reading.

Saturday, 6 September 2014

2./506. Schwere Panzerabteilung reinforced!! UPD. Now also 2./512. Schwere Panzerjäger Abteilung reinforced!

"Sir, we have replacements. Two PzKpfw VI Ausf. B "Tiger"s has just arrived from maintenance. Company is now at full strength."

Old KT in the middle, new KTs on the sides

This means my troops for Oosterbeek are now ready. Let those British and American dogs walk straight to our trap!

My oldest KT was made long ago and you can tell. But somehow now that all the KTs are ready and I put them side by side, I like the camouflage on the oldest KT is the best... strange! I thought I'd have learned to paint better by now. Perhaps I need to redo some of the camouflage on the new KTs. Perhaps some fading is in order.

Anyhow I wanted these to look that they have had some repairs in the rear areas and hastly sended to aid in the defense of Oosterbeek. That's why there are replaced guns and turrets etc. without camouflage paint (though should have bought the non-zimmerit ones, these look awful with zimmerit!).


Now to finish some Jagdtigers(done!) and 3,7cm FlaK43s!

UPDATE: 2./512 Schwere Panzerjäger Abteilung

Carius with his company

Now we have more Jagdtigers to deploy to the fields of battle. Their leader is the most famous Otto Carius, better known for his actions leading a Tiger I E tank.

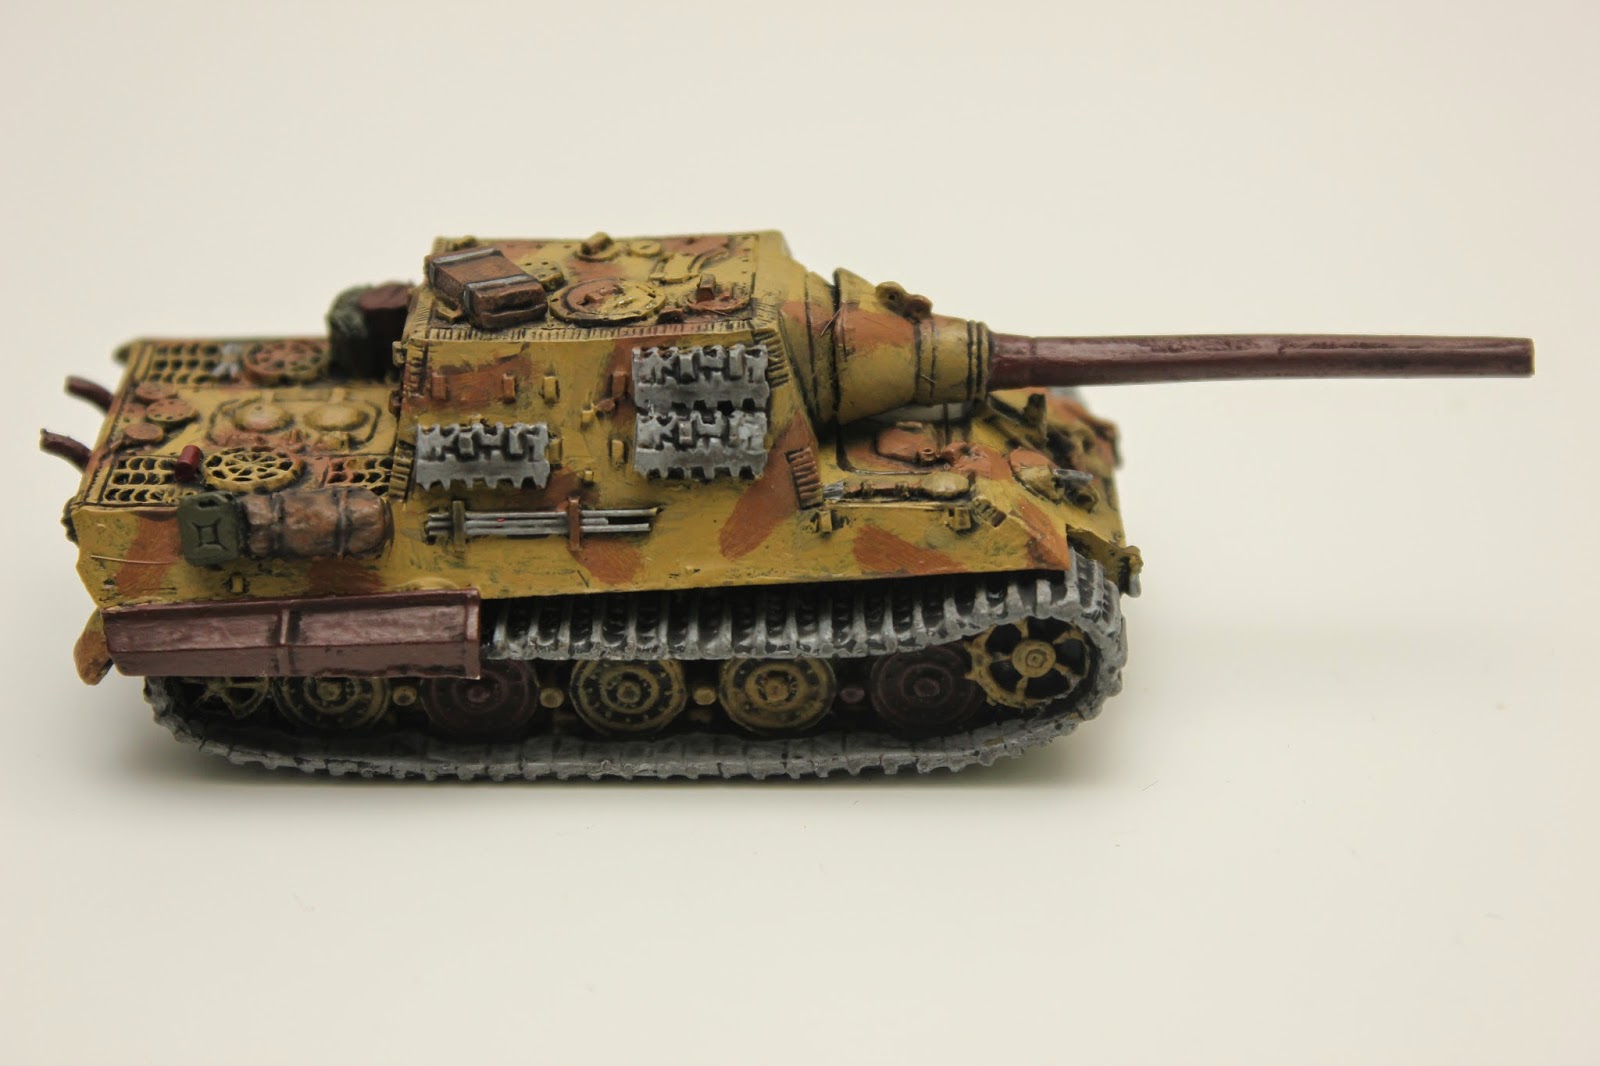
My Carius' model is not the BFs Carius but rather a normal Jagdtiger that I use as Carius. No need to buy one more Jagdtiger when I have 3 already!

Here again, as with KTs, I went with a worn look. Also some fuelcans and other stowage was added to personalization.

Enjoy!


Monday, 16 June 2014

German objective: Fried Eggs. Part. 1

Hello and welcome everyone!

Some very good news! Battlefront has been able to deliver me my Panzer III ausf. L or N (GE034). This means I'm now fully focused on building second objective for my German army (first one being "Forward Command Post on Sd Kfz 250").


So the idea is simple and as described already in my previous post and on topic I'm going to re-create a scene of next picture with some alterations:

Picture from http://deutsches-afrikakorps.blogspot.fi/2010/12/demands-of-life-in-desert.html

First, in the original propaganda scene they are frying the egg on a Pz.Kpfw II. I'm going to use Pz.Kpfw III ausf. L.

Second, the scene is originally filmed in the desert but as my Germans has been modelled, painted and based to a more colder climate, summer in Europe, I'll be modelling it to match my own army.

And third, as many of you readers know, Pz.Kpfw III ausf. L is rated to be a Mid War tank in Flames of War and my army being Late War, I've taken a liberty to still use it. Think of it as some replacement or training battalions tank if you like.

And here's some mock-up pictures of positioning. The guy next to the tank will be modelled or changed so that he will look more as frying the eggs, so possibly some arm-repositioning coming up if I'm not able to get my hands on a one exact figure from German Artillery HQ (Afrika) Staff team.


But here's all for now. Thanks for reading and stay tuned for more Fried Eggs!

Saturday, 24 May 2014

Some good news and some bad news!

Bad news first!

I got informed from FLGS that they are not able to deliver me the Panzer III L or N at the moment because all their sources are out of stock of that item. This means my objective project is going to take a huge delay which I'm very sad. I had hoped to get it all done by 1st of July but now I fear that even if I somehow could get my order, I won't be able to finish in time due to my other works.

Well when it's done, it's done!

Then the good news!

My Tiger I E has finished it's assembly (almost, I'm missing magnets from the turret as I can't find them anywhere in the house!!). The assembly was really easy and painless. Very limited flash and the hull was very clean.

I tried to add some fuel cans in a rack but couldn't find a place where I'd liked them. I even tried to bent it to fit it behind the turret basket. Otherwise I left t quite bare, no mud guards or sideskirts. This will give some rougnes in comparison to the other two Tiger I Es in my force.


Thursday, 22 May 2014

My new German toy has arrived!

Yes it's here!

No, sadly it is not the Panzer III I've been waiting for about a month now through my LGS, but it's big (huge?!) brother Tiger I E, which I ordered last friday from Element Games, arrived today. Fast delivery I'd say!

This new child of mine is going to complete my Atlantik Wall sPzK and will be my third Tiger platoon in my 4.SS Brigade list from Grey Wolf.

I hope to get this baby up and running soon to make room for other to be painted objects in my list, which is a bit too long for my liking. And hopefully I will finish my Soviet infantry at the same time.


Monday, 28 April 2014

Fresh eggs anyone?

While watching a documentary of German war-reporters during WW2, I saw a scene where German troops where making a fried egg on a side of their tank in Africa. From that I got an instant idea: I want that as an objective marker for myself!

This is a good one for me as I hate to always place just one "proper" objective marker and other that is just a plain card. So here I think is a good starting plan for my second objective.

I know that my first has been made in some "European" terrain with bushes and grass, not suitable for African weather conditions and thatyou propably wont find hot enough place in Europe to frie an egg on you tank but anyway I think this is cool.

Now I know that in this video footage, it's in Africa and I know that Germans didn't have Panzer III ausf. L models in Africa but would it still be proper to use this model as I think it's the most coolest Panzer III variant in Battlefronts line. And the second question, where can I find a figure that I can use as a cook?!

Please leave a comment or idea about this!

Thanks and see you around!

29.4. EDIT: Ordered 1 Panzer III ausf. L today. LGS site tells me that it takes 1 to 5 days to deliver the product... we'll see...

Sunday, 9 March 2014

May we have some Russian steel?

Hi all!

They are all done! 10 SU-100/SU-85Ms, 8 IS-2 obr 1943s and one T-34/85 obr 1944!

Took some time, and those IS-2s were made long before I even thought about buying SU-100s, but the important thing is I'm done with these. Now there are only 9 infantry stands to paint and base in various stages and I hope to have done those in the next month or so.

That will leave me some more infantry stands to paint and base but those are not needed at the moment so they can wait.

Also heres a picture of my IL-2 in winter camo.

Full cadre

Full cadre

Full cadre

Full cadre

SU-100s & T-34/85

IS-2s

IL-2 Support


After this I will return back to my German army and buff it with one more Tiger I E, some AAA and a Bergepanther. These will be for my Schwere Panzerkompanie from Atlantik Wall.

I found this list to be fantastic to play and I've always loved and wanted to field a Schwere Panzerkompanie mixed with Tiger I Es and KTs.

So here's the list I'm currentry playing in our Firestorm Caen campaing:

HQ
CiC - Tiger I E
Bergepanther recovery

COMBAT
1. Schwere Panzer platoon - 2* Tiger I Es
2. Schwere Panzer platoon - 1* KT (Porsche)

WEAPONS
Schwere Panzer Armored AA - 2* Armored Sd Kfz 10/5 (2cm)
Schwere Armored Panzer Scout platoon - 5 MG + 5 half-trucks

SUPPORT
21. PD - Panzer platoon - 3* Pz IV H
Rocket Launcher Battery - 3* 15cm NW41

1640 points/6 platoons

Could and should take that panzerfaust with my Armored Scouts, but those guys are always backed by either Tigers + KT of Pz IV Hs so there always is some AT with them.